

There are many pros to cedar decks – both aesthetic and structural. Cedar is naturally resistant to splitting, warping, rotting, and insect infestations. It also has a low shrinkage factor, especially when compared to other wood types. However, a certain level of cedar deck maintenance is required in order to keep your deck looking great.
With proper care and maintenance, cedar decks can last for upwards of 15 years. That’s a pretty good investment! And so, I decided to compile a list of important maintenance tips to help your cedar deck stay standing for years to come.
Quick Navigation

Cedar Deck Care and Maintenance Tips
1. Perform Regular Inspections
As with most aspects of your home, it’s important to perform regular inspections of your cedar deck to check for areas in need of a little TLC. Keep an eye out for warping boards and popped nails or screws.
Replace any missing nails or screws, and fill all nail or screw holes. When water continually pools in these little holes, it can cause the wood around them to rot.
On a similar note, inspect your deck for any soft spots or areas of pooling water. Both of these factors can also lead to rotting, so you’ll want to sand or replace problem boards as needed. Standing water is your deck’s worst enemy, so it’s hugely important to take care of it as soon as possible.
2. Move Furniture And Planters Around
A newly installed cedar deck will look gold in color before fading to a soft gray over time. While this is completely normal, you definitely don’t want your deck to be covered in both gold and gray hues. The easiest way to prevent this? Get in the habit of moving your deck furniture and planters around from time to time.
Changing the location of furniture and planters will help prevent color patches due to the harsh UV rays, as well as water potentially sitting underneath them. Since cedar is a relatively soft wood, you’ll want to be careful when moving these objects. Dragging them across your deck will leave marks, so always remember to lift!
 It’s also a wise idea to use padding or rubber tips for furniture legs. This will further prevent the legs from scratching the surface of your deck when people sit down on the furniture.
Padding is an extremely inexpensive alternative to looking at unsightly scratch marks all across your deck!
3. Avoid Rugs
Yes, it can be nice to cozy up an outdoor space by adding an area rug into the mix. However, many rugs will absorb and hold water, leading to perpetually wet deck boards underneath. Not only can this lead to premature wood rot, but it can also cause mildew to form.
If you’re set on adding a rug to your outdoor space, choose a rug made from plastic or synthetic materials , not a rug made from natural materials. Water will run right off of plastic and synthetic rugs, so you won’t have to worry about trapped water, rotting, or mildew.
Plus, plastic and synthetic rugs tend to weather a lot better. If it gets dirty or you spill something, just hose it off!
4. Sweep Regularly

This tip is extremely simple, but it’s also extremely important. It’s vital that you sweep your deck regularly (at least every one to two weeks, or more depending on the amount of trees in your yard).
Trees will inevitably shed their leaves, and they’re bound to end up on your deck. In the fall when the leaves are falling at a heightened rate, one damp or rainy day can cause them to stick. If you let them sit for long enough, they can even stain your deck.
Get in the habit of using a stiff-bristle brush to sweep your deck off on a regular basis. If you have a leaf blower, you can certainly use that as well.
Not only is sweeping a quick and easy way to protect your deck, but it’ll also help to make your deck look much tidier and aesthetically pleasing. I don’t know about you, but I’d way rather sit on someone’s neat and clean deck, as opposed to one covered in damp, slimy leaves.
5. Deep Wash And Clean
Every spring, you should get in the habit of giving your cedar deck a deep clean. As previously mentioned, cedar will start out as a gold color before gradually fading to gray.
If you like the gray, weathered look, don’t wash your deck. Thoroughly washing it will restore the wood back to that gold color, although it will ultimately fade back to the gray, weathered color in about two to three months. There are two ways to wash your deck: manually or with a pressure washer.
Manually:
 I manually washed my deck the following summer after it was first built. To clean my 12 x 12 deck, it took nearly six hours and I was exhausted by the end of it.
Although manually washing a deck is generally very time consuming, labor-intensive, and somewhat messy, it’s also quite inexpensive and a good method for people who don’t have access to a pressure washer.
To wash your deck manually, opt for an exterior wood wash solution. Work in small sections, scrubbing at the deck boards with the solution using a stiff-bristle, synthetic brush before rinsing clean. Remember, cedar is a soft wood, and even pressing too hard with a manual brush can cause dents and scratches.
Pressure Washer:
 Many people advise against using a pressure washer to clean a cedar deck, as the high pressure of the water can damage the wood. However, if you use a good pressure washer like Sun Joe SPX3000 2030 according to these tips, it’s highly unlikely that you’ll damage the wood.
It’s important to keep the pressure washer on a low setting (maximum 1200 psi). As an added precaution, you should also use a fan tip nozzle with a 45 to 60-degree spread. Use an exterior wood cleaning or brightening solution to spray before following up with a plain water rinse.
Start by spraying the railings, then work your way across the surface of your deck, finishing off with the stairs. Remember to spray at the same distance as you go along. It’s not a bad idea to wear rubber boots, rubber gloves, long pants, and goggles to protect yourself from getting soaked.
While a pressure washer and exterior wood cleaning solution are appropriate for lighter cleaning jobs, you should use a deck stripping product to remove old flaking stain. Sodium hydroxide-based deck strippers tend to be the most effective. Be sure to test the product on the stairs or an inconspicuous area first before spraying the entire deck.
Using a pressure washer to clean your deck is undoubtedly the quicker and easier option. If you don’t have a pressure washer, see if you can borrow one from a friend or rent one. If you don’t feel comfortable using a pressure washer, there’s no harm in cleaning it manually – just be sure you have enough time set aside to get the job done thoroughly.
Here’s how the deck looks after using a pressure washer on half of it:

6. Sand Rough, Fuzzy, Or Uneven Spots
After thoroughly cleaning your deck, you might think the job is 100% done. And it may be, but that depends on how big of a perfectionist you are! Even after a deep clean, your deck will likely still have rough, fuzzy, or uneven spots.
Thankfully, that’s what sanders are for! If you have a belt sander, that’s the one you’ll want to use. If not, see if you can borrow or rent one.
Use a belt sander to smooth out uneven spots or deck boards that are slightly warped. You’ll want to ensure your deck boards are as smooth and flat as possible to avoid that pooling water we discussed earlier.
When it comes to fuzzy spots (or wood furring, as it’s commonly referred to), you don’t necessarily have to sand them down as they will wear off over time. However, if these fuzzy spots are bothering you, you can lightly sand or buff them when the deck is completely dry.
Wood furring is very normal with cedar decks, and it’s due to damaged wood cells escaping through the surface of the board. Sometimes wood furring can be caused by a buildup of cleaning solution residue left behind on the wood, so ensure you’re always thoroughly rinsing your deck after cleaning to prevent wood furring from continuing.
7. Apply Good-Quality Stain
If you’ve inspected and cleaned your deck and are happy with how it looks, you don’t need to apply a stain. However, if you prefer the sleek look of stain over the more weathered look of unstained cedar, keep the following tips in mind to ensure your stain job is a good one!
Firstly, if you do decide to stain your deck, be prepared to do it again the following year. This is especially true if you live somewhere that’s cold and damp for much of the year.
The best time to actually apply the stain is in the spring or fall, when it’s not too warm or too cold. Choose a day that’s not humid, and avoid applying the stain in direct sunlight. Morning or early evening is a good time to stain, but if you choose the morning, be sure all of the dew has completely evaporated first.
The Staining Process
On a similar note, ensure your deck is completely dry and free of debris before applying the stain. If you stain your deck too soon after washing it, there’s a good chance the stain won’t stick or dry properly. You can either thoroughly sweep any surface dust or leaves from your deck, or use a shop vac if you have access to one.
When it comes to the staining process, avoid using a paint roller. Although paint rollers can cover a bigger surface in a shorter amount of time, a roller doesn’t allow the stain to fully sink into the wood. If you do use a roller, always follow afterward with a brush.
When applying a traditional stain, it’s best to use a brush with synthetic bristles. If you choose to apply some sort of natural oil to the wood instead, use a brush with silk bristles for the best application.
Remember, don’t just stain the top surface of the deck boards. Stain all sides of the boards to prevent the stain from peeling or flaking at the edges.
A great alternative to using a paint brush is to use a stain applicator pad. These pads act like a sponge and allow for the stain to penetrate the wood boards.
Whichever way you decide to stain the wood, it’s best to apply two coats for even coverage. Always allow for at least 48 hours of drying time before walking around on the deck and repositioning your patio furniture.
Choosing A Stain
 There are so many exterior wood stains on the market, and it can seem overwhelming to try and choose the best one. Before rushing to stain your new deck, it’s best to wait at least three months.
Cedar doesn’t absorb moisture as easily as other wood types (which is why it’s less prone to rotting and damage), and waiting a few months will help the wood to become more porous and absorb the stain more efficiently.
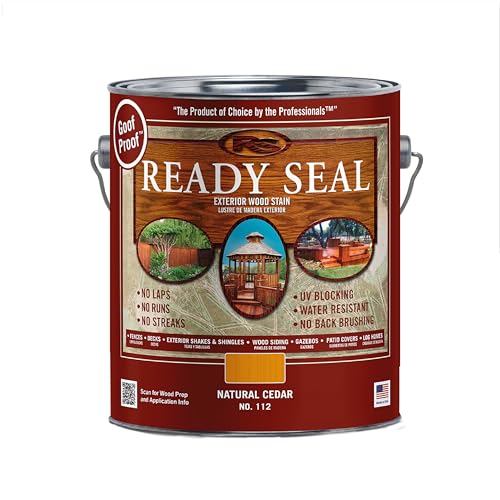
High-quality oil-based exterior wood stains are always a good choice for cedar, as this variety of stain works to penetrate the wood while also providing UV protection. Look for a stain that has a mildewcide (mildew deterrent) built-in for added protection. Although you should be prepared to restain your deck after a year or so, choosing this type of stain may buy you a bit of extra time.
Conclusion
A cedar deck is relatively easy to construct and will look great for years to come – as long as you perform some semi-regular care and maintenance. While giving your deck a deep clean will give it a nice weathered-look, choosing to also apply a stain will make your deck look sleek and stylish.
Now that you know these cedar deck care and maintenance tips, hopefully you’ll be well equipped to properly maintain your deck and keep it looking great. Thank you for reading, and if you’ve found these tips helpful, please let us know in the comments below.