
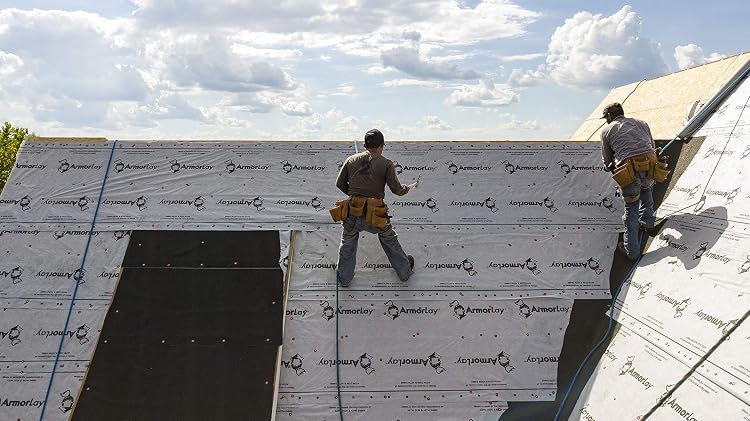
When preparing to shingle or reshingle a roof, laying roofing felt offers an extra barrier against moisture. It helps protect the sheathing and the shingles and commonly has parallel lines printed on it that make shingle placement easier. If you’re unsure how to install roofing felt or are just looking for some pointers, this guide is all you need.
Unroll the start of the first course, align with the edges and chalk line, and tack down the gable edge. Roll out the rest of the course, tacking along the center as you go. Cut it at the opposite gable edge, and roll out and staple the next course with the desired overlap. Repeat as necessary.
In this guide we’ll discuss what roofing felt is, why it is necessary, and the different types of underlayment. We’ll explain how to install the roof felt and drip edge, and make some tool and material recommendations. By the end of your read, you should know how to install felt underlayment for asphalt shingles.
Quick Navigation

What is Roofing Felt?
Roofing felt is made of natural or synthetic materials such as wood cellulose, recycled cloth, fiberglass, or polyester. The heavy-duty felt or paper is saturated or coated with bitumen. Bitumen is a waterproof mixture of coal-tar pitch or asphalt and other viscous and sticky organic liquids.
Felt provides a breathable, water-resistant membrane that helps shed moisture that makes it past the shingles. It is available in rolls of 15 and 30-pounds per hundred square feet. Many manufacturers offer 10-year guarantees for felt. When protected by well-maintained shingles, the underlay will last between 20 and 30-years, or as long as the asphalt shingles.
Roof felt is often called tar paper and is commonly used in similar ways, however, they are different. Tar paper is infused with tar, and roofing felt with a bituminous substance – granted, a semantic difference as both are petroleum-based products.
Is Roofing Felt Necessary?
Roofing felt is commonly used between roof deck sheathing and roof shingles. There are applications where felt is necessary and others where it is not. Here are some reasons why felt paper is necessary:
- Building Code [IRC2018 Table R905.1.1(2)] requires two layers of underlayment for low-slope roof decks between 2/12 and 4/12
- Local Codes may require it for slopes greater than 4/12
- Many home and roof warranties require felt paper
- NRCA (National Roofing Contractor Association) recommends bitumen, asphalt, tar, or synthetic felt for asphalt shingles
- The NRCA recommends water-resistant underlayment for roof slopes greater than 3/12
- Roofing felt helps to prevent pitch, uneven or sharp edges, and nails from damaging shingles
- Some shingle warranties are void if felt isn’t used
- Necessary to meet Class A fire rating with some shingles
- Provides additional protection to the roof decking against moisture penetration
- When removing old shingles, fully remove and replace the old felt with new felt
Types of Roof Underlayment
There are three main types of underlayment applied to roof decks prior to asphalt shingles and other roof coverings. They are waterproof or water-resistant and provide additional protection and a barrier against moisture penetration. The three types are: Asphalt, tar, or bitumen-saturated felt, Synthetic or non-bitumen underlay, and Rubberized asphalt underlay.
Asphalt, Tar, or Bitumen-Saturated Felt

- Made of tar, asphalt, or bitumen-saturated organic or fiberglass substrate felt paper
- Black in color and not UV protected
- Almost 200-years of successful use
- Commonly used for slopes greater than 3/12
- Water-resistant and breathable, not waterproof – sheds moisture, doesn’t trap it
- Available in two thicknesses
- 15-pound is lighter and thinner, and easier to damage; it has a permeability rating of 5
- 30-pound is thicker and stiffer, and more resistant to damage; provides greater protection
- Must overlap 19-inches or more on a low slope, 2/12 to 4/12, to form a double layer on the whole roof deck
- On slopes greater than 4/12 the courses of felt should overlap at least 2-inches
- Commonly fastens with staples or in high wind areas with plastic capped nails or plastic wind-strips
- Compounds leach out over time and with sustained exposure to heat it becomes more absorbent
Synthetic or Non-Bitumen Underlay
- Manufactured from polyethylene or polypropylene, plus fiberglass in an asphalt-saturated base layer
- Equivalent to felt but withstands higher temperatures
- Lighter and stronger than felt, wrinkle-free, and may have a non-skid coating that is slip-resistant even when wet
- Resistant to moisture, mildew and fungal growth, and UV damage
- Can be left weather-exposed for 6-months or more
- Overlap depends on the slope and manufacturer’s instructions
- Fastens to deck with roofing nails or plastic cap nails – staples aren’t recommended
- Not self-sealing
- May void warranties for some asphalt shingles
Rubberized Asphalt Underlay

- Polyester or polyethylene layer bonded to a weather-resistant non-skid upper layer
- Has little or no asphalt in it
- May have a moisture-resistant polymer film and/or a mineral coating melded to the upper layer
- Typically self-adhering with a peel-off membrane protecting the adhesive side
- Rubber-like material will self-seal around nails and staples, making it waterproof
- Very flexible for irregular surfaces and different temperature extremes
- May be designed to resist high-temperatures up to 250°F
- May be fiberglass-reinforced or polymer-modified for strength and elasticity
- May have a selvedge edge or sticky strip along the upper edge to form a stronger watertight seal with the overlapping upper course
- Typically more expensive than other underlay treatments
Synthetic or non-bitumen underlay has become a popular choice with roofers over the past decade. It is quicker to install and can withstand winds and extended exposure better than felt. The synthetic underlay has greater water-resistance and the no-slip coating offers better traction for installation safety.
It also doesn’t wrinkle when wet or crack and split in the cold. The main drawbacks are cost and the need to use capped fasteners.
How to Install Roofing Felt
Installing roofing felt is easy to install and is the first step to protecting your roof decking and home. It sheds precipitation while awaiting shingles, protects the shingles from resins and glues leaching from the decking, and acts as a second line of defense against moisture.
How Many Layers of Felt Do You Need
Different roof slopes require different protection for asphalt shingles. The International Residential Building Code (IRC) states two layers of felt for slopes between 2/12 and 4/12. For slopes greater than 4/12 a single layer of felt is acceptable. The NRCA (National Roofing Contractors Association) recommends a double layer of 15-pound underlayment for roofs between 3/12 and 4/12, and a single layer for decks greater than 4/12.
Local codes may have different requirements, and shingle manufacturer warranties often specify underlayment requirements, so check them out too. Heavyweight asphalt shingles commonly have a longer service life. Instead of using lighter-weight 15-pound felt, use the heavier 30-pound felt as it will last longer too.
How Much Overlap on Roofing Felt
Overlapping roofing felt protects the roof deck from seepage, wind-driven precipitation, and ice-dam back-up. For roofs with slopes greater than 4/12, a minimum overlap of 2-inches between courses is required. A greater overlap provides more protection but may cause problems with spacing and fastening upper courses relative to sheathing seams.
On low slope roof decks between 2/12 and 4/12, the recommended overlap for roofing felt is a minimum of 19-inches. The first course or starter strip is a 19-inch width of felt, and the next course overlaps it fully. Successive courses repeat the 19-inch overlap.
Where the felt isn’t long enough to complete a course there should be a minimum of a 3-inch overlap. Ridges, hips, and valleys should overlap at least 6-inches beyond the centerline, and there should be a similar overlap below vent pipes and utility stacks.
How Much Roof Felt Do I Need?
Roof felt is available in weights of 15 or 30-pounds per 100sqft. A typical roll of 15-pound felt is 36” wide and 144’ long and covers 432sqft. The 30-pound roll is 36” wide by 72’ long and covers 216sqft.
To determine how much felt is required for a roof, find the area of the roof deck to be covered. Measure the length from edge to edge and the eave to ridge, and multiply the values for the area of half the roof. Double that value and you have the full roof area. For irregularly shaped roofs, break it down into smaller rectangles or triangles to calculate the areas.
For roof slopes greater than 4/12, multiply the area by 1.10 to account for the 2” overlap and potential waste. If there are hips, valleys, or dormers, increase the total by 10 to 25%. Divide the resulting area value by the area one roll of 15 or 30-pound felt will cover, and round up as it’s sold in full rolls. For slopes between 2/12 and 4/12, double the resulting area value and then divide by the area a roll of felt covers.
For example:
-A 5/12 roof deck 4’x 8’ is 32sqft x 1.10 = 35.2sqft. Divided by 432 for 15-pound felt or 216 for 30-pound felt and round up for full rolls – for this roof they’ll be lots of leftover from one roll for the next project.
-A 3/12 roof measuring 20’x48’ per half is 960 for a total area of 1920sqft. Multiplied by 1.10 is 2112sqft. Divide by 432 or 216 depending on the weight of felt for 4.89 rolls of #15 or 9.78 rolls of #30 felt. Due to the low slope, the felt needs to be doubled. So, with rounding, you’ll need 10 rolls of 15 pound felt or 20 rolls of 30-pound felt.
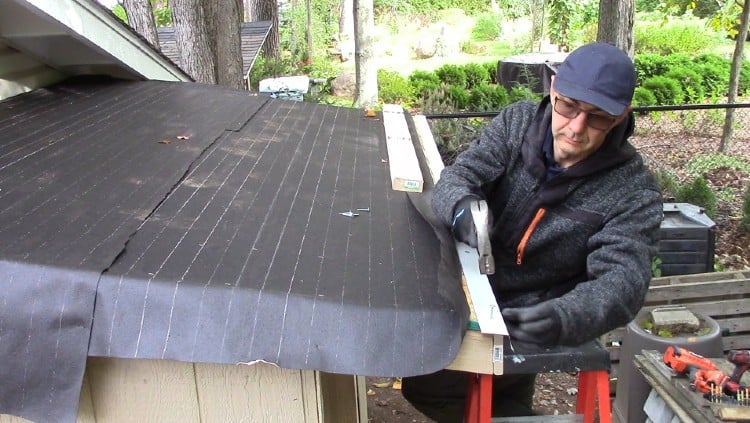
Drip Edge
The drip edge protects the edges of the roof deck and is often installed after the underlay is attached. Install the drip edge to the eaves (the lower edge of the roof) prior to rolling out the felt, or slide it under the felt underlay and over the fascia. On the rakes or gable ends, the drip edge goes on top of the felt, helping to seal the end and prevent moisture penetration under the shingles.
How to Attach Roofing Felt
Tack or fasten roofing felt using stainless steel ¼” to ½” T50 staples or 7/8” to 1-1/2” hot-dipped galvanized or aluminum 12-gauge shank roofing nails with a 3/8” head diameter. Use the nails with or without plastic caps. The caps help prevent tearing and are helpful for keeping the felt in place if it is windy, or if there will be a delay laying the shingles.
Fasteners should be about 8” apart in the bottom 3/4 of the paper. Staples are faster but lack the holding power of nails. However, a roofing air nailer or air plasti-cap nailer are almost as quick. It is important to note that local building and fire codes may require cap nails instead of staples, so check the fine print.
Install Roofing Felt
The size and complexity of the roof decking affect how long the task will take, but regardless of size, most felt installs are similar. Replace any damaged decking and sweep the deck clean of sawdust and debris. Remember to follow appropriate safety practices when working from ladders or on roofs.
Measure
Measure the deck from the bottom to top for the number of courses of paper. For low slope roofs mark every 17” and snap a chalk line from gable to gable. Rolls of felt are typically 36” wide, and low slopes require 19” overlaps. Mark every 34” or 33” and snap a line across the deck for 2” or 3” overlaps on slopes greater than 4/12.
The chalk line provides a parallel reference line for aligning the felt courses. The first course commonly extends past the lower edge of the sheathing by 1/2″ or to cover the drip edge.
Unroll
Unroll the first course beginning at one gable edge and rolling to the opposite edge. After unrolling the first 5’ to 10’ or so, tack the gable edge and centerline of the paper once it’s aligned with the chalk line. Continue unrolling and tacking until you near the other gable edge.
Within the last foot or so, roll back onto the course and push the course down at the edge to create a crease, and cut it with a utility knife or hook knife. Begin the next course from the edge just cut, moving up to the next chalk line. Tack the gable edge and tack the bottom edge and mid-line as you unroll. Repeat until the roof is covered.
Cut
The lower edge will need to be trimmed to the drip edge. This can be done prior to tacking or afterward. Use a utility knife or hook-bladed knife to cut the felt. Unroll the felt on the roof deck or ground, measure the width, and cut. At the gable ends trim flush to the decking or leave 1/2″ to 1” to wrap the edge when installing the drip edge.
Attach
Once the course of felt is tacked in place aligned to the chalk line, trimmed, and cut to length, go back and add more staples or nails to secure it in place – approximately every 4” on gable edges and 8” apart elsewhere. Don’t tack the upper edge as it will be tacked down with the overlapping next course.
Use stainless steel ¼” to ½” T50 staples or 12-gauge shank 7/8” to 1-1/2” hot-dipped galvanized or aluminum roofing nails with a 3/8” head diameter. If required by code, wind conditions, or just regular practice, use plastic capped roofing nails.

Ensure the roof deck is clear of debris.

Roll out the first course, tacking it down as you go.

Tack the next course or layer into place.

Tack about every 4” on gable edges and 8” or so everywhere else.
Install Eave Drip Edge
Drip edge flashing has three distinct parts and typically comes in 10’ lengths. The roof leg has one to three ridges to slow moisture movement, the smooth vertical leg sheds water, and the kick-out pushes it away from the facia. Install the drip edge, so it projects past the ends of the eaves by about 3/4″ at the gable or rake end.
The roof leg goes under the underlayment and should be nailed every 8” to 12” along the deck with 1” aluminum or galvanized roofing nails. The angled corner should be flush to the facia while the outer edge of the kick-out stands out between 1/4″ and 1/2″ to keep runoff away from the structure and into the gutter.
The drip edge is nailed every 8” to 12” with 1” roofing nails, and the ends project 3/4″ past the rake or gable end.

Trim the felt, so it is flush with the face of the drip edge.
Install Rake Drip Edge
To protect the rake or gable ends from wind-driven moisture, the drip edge is placed over the underlayment to seal it down to the deck. The felt should be trimmed flush with the edge or 1/2″ past to wrap the edge when the drip edge is placed.

Cut the extended eaves drip edge flashing between the roof leg and vertical leg at a 45° or 90° angle to the rake edge. Fold the top part of the extended metal down so it is covered by the rake drip edge.
Start at the lower gable edge of the roof deck and work upward. Upper lengths of edge flashing should overlap lower lengths by a minimum of 6”. Nail every 8” to 12” and about 1-1/2” in from the outer face of the drip edge.

Nail every 8” to 12” and approximately 1-1/2” in from the outer edge.

The last part of the extended eaves edge flashing is folded back over the rake edge and nailed into place, thus sealing the exposed corner of the drip edge.

How Long Can Roofing Felt Stay Exposed?
Roofing felt isn’t designed to be left exposed to the elements. It will protect the roof for about a month without shingles, provided it is fastened properly and it isn’t too windy. The longer it is left uncovered, the more it will weather and fade.
The sun makes the felt brittle and more susceptible to tearing, and rain causes it to ripple. The sooner it is protected by shingles, the better.
Recommended Materials and Tools
Tarco No.30 Asphalt Felt
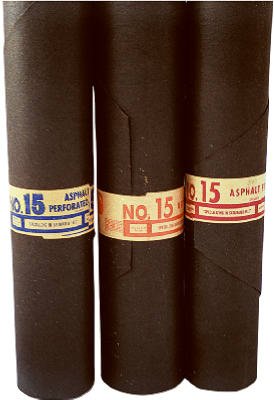 Tarco No.30 is asphalt-saturated felt and meets ASTM standards for roof underlay.
A 36”x72’ roll covers 216sqft, weighs about 32-pounds, and has printed lines at 2”, 4” and 17” for easier placement of upper courses and shingles.
Milwaukee Crown Stapler
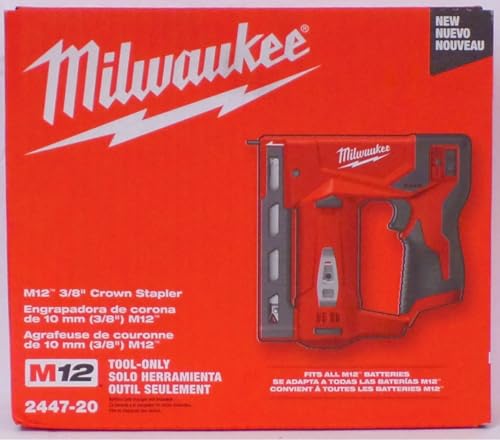 The Milwaukee M12 cordless crown stapler is compatible with most 1/4″ to 9/16” staples. The ergonomic grip, compact design, and 3-pound weight make it easy to use.
It effortlessly discharges up to 1500 staples per single 1.5Ah battery charge and has a power adjustment for different materials.
The M12 also has a functional belt clip which makes it easy to stow and free up your hands.
Dewalt Hammer Tacker
 The 10-1/2” long, 4” high Dewalt hammer tacker is made of die-cast aluminum and weighs 2.4-pounds. The ergonomically designed staple hammer is weighted forward for ease of use and has a surface guard to protect contact points.
It has a heavy-duty, anti-jam stapling mechanism and magazine that loads from the bottom of the handle. Use with Dewalt DWTTH700 series, Stanley TRA700 series, or Arrow T-50 5/16”, 3/8”, or 1/2″ staples.
Arrow 1/4-Inch T50 Monel Rust Proof Staples
 Arrow’s 3/8” flat-crowned, 1/4″ T-50 Monel staples are corrosion resistant for outdoor and marine use.
With 1000 per box, the 1/4″ length is ideal for tacking roof underlayment.
The T-50s are compatible with most brands of staple guns or hammers.
Conclusion
Installing roofing felt is the first step to shingling the roof deck and is an additional layer of protection for the roof. The steps are pretty much the same whether it’s a big roof or a small one. Measure up the roof and snap chalk lines where the upper edge of each course will go. Roll out the first course, align it, tack it down with galvanized nails or staples, and cut it to size. Repeat until the roof is covered.
I hope you found the guide informative and have a better understanding of how to install roofing underlayment. If the guide was helpful, please share it with others. As always, your comments and suggestions are appreciated.