
For those who live in parts of the country threatened by powerful hurricanes or even tornadoes, hurricane straps are a necessity. These invaluable devices consist of heavy gauge galvanized metal. They create a strong connection between the roof and walls of your home, preventing the roof from lifting off during extremely high winds.
Hurricane ties are usually installed on the home’s exterior to provide the most secure connection between the roof, walls, and foundation, ensuring the greatest possible resistance to upwind and lateral forces that can cause catastrophic damage to a building.
In this article I will explain how to install hurricane ties and where they should go, inside, outside or on both sides of the wall.
Quick Navigation

What are Hurricane Ties?
As their name suggests, the purpose of a hurricane tie is to make a building more structurally sound by reinforcing the connection between the roof and exterior walls. This prevents high winds, such as those experienced during a hurricane, from lifting off the roof off the structure.
Hurricane ties are standard in states that experience annual hurricane threats, such as Florida, Louisiana, and coastal communities in the southeastern U.S. You’ll also find them in the midwest in homes that face the risk of tornadoes.
The tie works by creating a structural load connection that transfers forces made to the top of the building all the way to its foundation.
This means that if a strong upwind impacts the roof, the tie will transfer the force from the framing of the uppermost parts of the roof through the walls to the foundation, creating a much stronger structure that will resist upwind forces that could lift the roof off.
A hurricane tie consists of a piece of heavy gauge galvanized or stainless steel that connects to the joists and top plates, to the rafters, or, in the case of a truss-style roof, to the top chords.

The old saying, “a chain is only as strong as its weakest link,” applies to hurricane straps.
For the load transfer to be successful, a hurricane tie must provide a secure connection from the top of the roof to the wall joists.
A tie that does not engage the top chord of a truss, for example, could allow wind to pull apart the uppermost section of the roof. Likewise, a tie that doesn’t engage the joists in the wall could result in the wall’s top plate pulling away from the joists.
Are Hurricane Ties Required?
After category 5 Hurricane Andrew devastated Florida in 1992, causing more than $25 billion worth of damage, Florida began requiring that all new construction use hurricane ties.
While neither the International Building Code (IBC 1604.4) nor the International Residential Code (IRC R301.1) expressly requires hurricane ties, both state that a “complete load-path” be created between the foundation and whatever force is put upon the structure.
That means that when the roof is faced with potentially damaging winds, the foundation should be helping out. The only way that is possible is if there is a strong connection from the roof to the foundation.
Types of Hurricane Clips
Given the diverse design styles of roofs, with some having rafters and others using trusses, there are different types of hurricane clips you can use to adequately prepare your home or shed for damaging winds.
Simpson Strong-Tie H1 Hurricane Tie 18 Gauge
 Simpson Strong Tie H1 clip is one of the most commonly used. This rugged clip cradles the truss or rafter on two sides.
The bottoms of the clip engage with the top plate via four screws, creating a very secure connection between the roof and walls.
Each clip is 5.25 inches long by 5.25 inches wide with 3/4-inch wide flanges. The H1 uses 18-gauge galvanized steel.
In addition to preventing uplift, these rafter clips are also designed to resist downward pressure on the roof, such as from heavy snowfall, by providing reinforcement that prevents the rafters from disengaging from the wall plates and spreading outward, causing a collapse.
This tie can be installed on the inside or outside of the wall. Keep in mind that these ties create a strong connection between the top plate and rafter, so you may need an additional tie to reinforce the connection between the top plate and the wall joists.
In the case of a truss, make sure you install this clip so it attaches to the top chord as opposed to the bottom chord to ensure maximum protection.
Simpson Strong-Tie H2.5A 18-Gauge Hurricane Tie
 The H2.5A and S/H3 models of hurricane ties work on one side of the rafter or truss, providing moderate protection from wind. They’re made from heavy 18-gauge galvanized steel, so you don’t have to worry about them rusting or corroding if exposed to the elements.
Similar to the H1s, which cover both sides, the H2.5A provides a continuous load path that travels from the roof to the wall plate.
These ties are designed to attach to connect the wall’s top plate with the truss rafter. For maximum lift resistance, they can be installed on both sides of the rafter or joist.
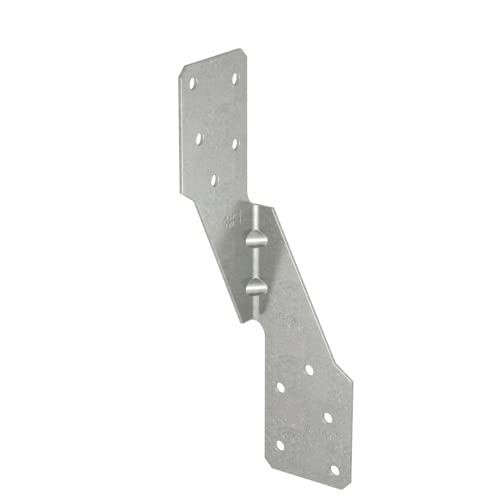
H Hurricane and Seismic Ties
No products found.Simpson’s No products found. are designed to meet a variety of different rafter and truss styles. The stout H10 hurricane tie is angled to allow it to fit roof slopes of up to 6/12 with rafters that use blocking, creating very strong resistance against uplift.The H-16 functions as a strap, wrapping entirely around the truss or rafter and under the wall top plates on both sides. This is an excellent option for trusses, where it may be difficult for other ties to reach the top chord.
It features a pre-sloped seat for trusses with a 5/12 slope and enough length to cover trusses up to 13/5 inches high. The HS24 is sandwiched between the truss or rafter and wall plate, cradling the truss or rafter on two sides.
A tab that runs down one side connects the tie to the wall plate. It will work with pitches from 0/123 to 4/12 with double 2×4 top plates. With its double shear nailing, this tie offers a high level of lateral wind resistance.
Do Hurricane Ties Go Inside or Outside of Walls?
Because it can be structurally stronger and more convenient, it makes the best sense to install hurricane ties on the outside of walls. That said, it is certainly possible to create an equally secure connection with an inside installation.
Benefits of Installing Hurricane Clips Outside
 While it’s acceptable and in code to install hurricane ties both inside and outside the wall, there are a few reasons why you might want to install the ties externally.
If the roof design uses ceiling joists that rest on the top plate adjacent to the rafters, an internal installation will force you to attach the tie to the joist, which will not secure the roof rafters.
In this case, the external installation allows you to get a secure connection via the rafter tail.
An external installation also allows you to use the wall’s sheathing for additional support.
If the tie is installed on the inside of the wall, the uplift created by high winds could potentially cause the wall plates to begin to pull free from their nails, causing them to roll towards the external side of the wall in a phenomenon called “top plate roll.”
By installing the ties externally, the sheathing provides additional support that prevents “top plate roll” from happening.
If installing ties on a truss roof, an external install also makes sense. With a trust, there is typically a plate that connects the top chords with the bottom chord on either side of the truss close to where it meets the wall plate on the interior side of the wall.
This can interfere with the hurricane tie, making it difficult to secure. An external installation avoids this problem.
There’s also an aesthetic reason for going with an external installation. If you’re installing ties on a structure with exposed rafters, you may not want visible metal ties on the inside of the structure. Hurricane ties can also be difficult to work around when installing drywall.
When Should You Install Hurricane Ties Inside?

Installing hurricane ties on the inside of the wall is perfectly acceptable and sometimes may be necessary.
Some retrofits are more easily performed on the internal side of the structure, especially if you are retrofitting an unfinished space such as a shed or garage that has exposed framing on the interior.
Installing Rafter Ties on Both Sides

Although it may be overkill, depending on where you live, installing rafter ties on both sides in areas highly susceptible to strong hurricanes is a good idea. Doubling up the hurricane ties will add additional resistance to both lateral and uplift winds.
In fact, some models are designed to cover both sides in one clip. This includes U-shaped hurricane rafter clips that cradle the truss or rafter as well as straps that loop all the way around the top of the rafter or truss and under the wall plate on both sides.
How to Install Hurricane Ties on Rafters Properly
There are a few guidelines you should follow for properly installing a rafter.
 Begin by purchasing the right screws. For maximum strength, you’ll want to use Simpson Structural Screws, which are designed to secure hurricane ties and will resist rusting and corrosion. Be sure to check the ties to determine how many screws you’ll need.
Whether installing the ties on the interior or exterior, make sure to follow the manufacturer’s instructions for properly positioning the tie on the top plate and rafters. For a u-shaped tie, make sure the tie is cradling the rafter or truss and that it’s flush against the wall plate.
Once the tie is properly in place, install the screws. You may need to drill a pilot hole first, especially if you’re using a manual ratchet to install the screws.

It’s critical to make sure that you install screws in all of the pre-drilled holes to ensure the tie provides maximum protection from wind uplift and lateral forces. A u-shaped hurricane tie will have 10 screws.
Remember, for maximum protection you also need to consider installing additional ties that connect the top plate to the joists as it is possible for the top plates to pull up from their nails in high winds, especially if the ties are installed on the interior of the wall and do not have the external wall sheathing to help with support.
Some extra long straps will actually wrap about the rafter or truss and extend down the joist, connecting the rafter, top plate, and joist together. This type of connection creates a very strong load path from the roof to the foundation.
You can achieve the same strength with a u-shaped connector and a strap that connects the top plate to the joist. If there isn’t enough room for both, then attach straps connecting the joists to the wall plate where there are no rafters.
If you’re using larger dimensional lumber for the trusses or rafters, you may need to make a birdsmouth cut on the rafters, especially if installing the tie on the inside of the wall.

A birdsmouth cut is a small notch cut out of the rafter that accounts for the pitch of the roof, enabling the rafter to rest flush against the wall plate. This will allow the truss or rafter to sit flush on the wall plate, eliminating the gap between the plate and the rafter, allowing you to properly installing the tie to both.
A birdsmouth cut will also allow your roof to better handle loads, such as heavy snow, as a flush joint between the rafter and top plate transfers the weight of the roof to the walls and foundation, reducing outward forces.
How to Install Hurricane Straps on Existing Roof
If you live in an older home, the roof may not be secured with hurricane ties, which may mean you’ll need to perform a retrofit to ensure the structure can endure powerful winds. There are several ways of doing this.
Retrofitting a house from the inside is not an easy task as you’ll have to remove the drywall. Rather than remove all drywall from a room, remove a strip of drywall from the wall and ceiling that is uniform around the exterior walls.
To do this, measure how much drywall you’ll need to remove in order to place and secure the hurricane tie. A strap that extends 5 inches or more down the stud will require more drywall removal than, say, a u-shaped strap that only covers the wall plate.
This will allow you to more easily replace the drywall when the retrofit is done. Just make sure you visit the attic and pull any insulation away from the area you plan to cut to prevent it from falling through into the room when you begin removing the drywall.
As with new construction, attach hurricane straps at places where the rafters are over studs and use a twist strap, which will allow you to attach the rafter to the stud for a strong load-path to the foundation.
If the rafters and studs don’t line up, you’ll need to attach structural ties to the top plate and joists as well as to the rafters and top plate.
Once the hurricane ties are in place, you can reinstall the drywall. You’ll want to match the thickness of the drywall and cut the new pieces to create as tight a fit as possible to avoid a noticeably uneven look where the drywall is joined. If you’re not skilled in the art of drywall and mudding, you may want to bring in a pro for this part to achieve a clean look.
Completing a retrofit from the outside still involves a significant amount of work, but it’s much easier than an internal renovation. Oftentimes you can access the rafters by removing the soffit panels.
Wood soffit panels can be carefully removed using a pry bar, then reinstalled when you’re done. In the case of vinyl panels, simply pop them out of their track and remove them. Aluminum soffits will slide out the corners of the eves.
Just make sure you don’t mix up the panels once you’ve removed them as they are usually cut to size and aren’t interchangeable.
Once you’ve gained access to the rafters, check the sheathing type and how high up the wall it comes on the joists. If the wall sheathing comes all the way to the top of the top plate, you have a strong wall that is reinforced by the sheathing and thus does not need a strap that connects the joists to the rafters or truss.
Simply reinforce the connection between the sheathing and the top plate by adding 10d nails. Then install a u-shaped hurricane tie that connects the top plate to the rafter.
If the sheathing is made out of foam or fiberboard, it won’t provide any structural support, so you’ll need to install straps that run from the rafters to the joists or separate structural ties that connect the top plate to the joists in addition to the hurricane ties.
Another option for retrofitting hurricane ties on a home involves going through the roof. This can be done by removing the roof sheathing around the eaves of the home. Of course, you’ll have to remove the shingles along with the sheathing, which will require you to replace them with new ones when you reinstall the roof.
This method makes the most sense if you’re planning to replace a worn-out roof. In fact, Florida requires you to add hurricane ties to homes over $300,000 in value if the roof is being replaced.
Conclusion
By choosing the proper place to install hurricane ties and the correct model to suit your needs, you can protect your home from the damaging winds caused by tornadoes and hurricanes. While the best place to install a hurricane tie may be on the exterior of the wall, there are options for creating connections on the interior of your home that will provide the same level of resistance.
I hope this article helped you to decide what hurricane ties are suitable for your house and how to best install them.