
Whether to insulate a shed or not often depends on climate and use. Insulation will keep a shed cooler and drier in hot humid seasons and drier and warmer in cold or damp seasons. So, if you plan to use your shed to store valuable items in, as a workshop, or for extra living space, knowing the cheapest way to insulate a shed will be helpful!
There are many options for insulating a shed. Recycled materials like bubble wrap, cardboard, or carpet can be used to cheaply insulate a shed, as can clay, hay, straw, or old newspapers. Fiberglass, cellulose, and rigid foam or fiber insulation are more expensive options but are DIY friendly. Spray foam, though, will seal all cracks and crevasses, but could cost more than the shed.
In this article, we’ll identify different ways to insulate a shed, including the average costs, plus different ways it can be done for free. We’ll also discuss other insulation techniques to make your shed more airtight, and thus less susceptible to outside climate conditions. Our aim is to provide you with the information to make the best choice for your project.

Quick Navigation
Cheapest Ways To Insulate a Shed
Insulating a shed helps to regulate the interior temperature and keep the dampness out. Dampness can cause oxidation on metal tools, fabric items to mildew, and paper to curl or get soggy. Plus, it can make everything smell musty.
Adding insulation can improve your shed’s environment for stored items and extend their lifespan. If the shed is a workshop or extra living or sleeping space, it can help improve its comfort and usefulness too. Remember, insulating the walls is only part of the solution, the floor and ceiling or rafters also need to be insulated.
Below are some of the more common ways to insulate a shed along with their average cost per square foot. Some materials may work better in some situations, so consider what is best for your project as well as the price when making your selection. It should be noted, though, that the cost of some insulation varies from zip code to zip code.
1. Bubble Wrap
 Bubble wrap is commonly used as a protective packaging material by many industries. It is two layers of clear plastic with air-filled bubbles in between. The trapped air helps to warm or cool the air inside the shed while plastic forms an air barrier reducing air movement through the walls.
Regular bubble wrap has an R-value of 1 to 2 per inch of thickness and heavy-duty wrap between 2 and 3. It is a radiant barrier best to use on wooden sheds, not metal or plastic ones.
The bubble wrap can be stapled between the studs or across the studs and covered with a protective wallboard. Alternatively, wrap the exterior of the shed walls and then cover it with a protective exterior grade wall covering. That will allow you to keep using the cavities between the studs for shelving and not have to move everything to find the interior wall faces.
Cost: Rolls of various sizes are $0.15 to $0.50 a square foot while recycled packaging material is free.
2. Fiberglass Batts

Fiberglass insulation batts are commonly 48 or 93 inches long and between 15” and 24” wide. The spun glass traps air to form a thermal barrier that cools in the summer and warms in the winter.
It has an R-value of 3.1 to 3.4 for every inch of thickness, so the thicker the batts, the greater the R-value. Plus, it can also help mitigate sound transfer through the walls. Unfortunately, fiberglass can absorb moisture and attract insects and rodents.
The batts compression fit between the studs and are easy to cut with a utility knife. The fiberglass particles can become airborne, so wear protective clothing and devices when installing the batts. For the same reason, the fiberglass should be covered with a plastic vapor barrier and wallboard for the best effect.
Cost: Average cost is $0.25 to $1.75 a square foot depending on the volume purchased. You may get returns or open packages for less.
3. Cellulose
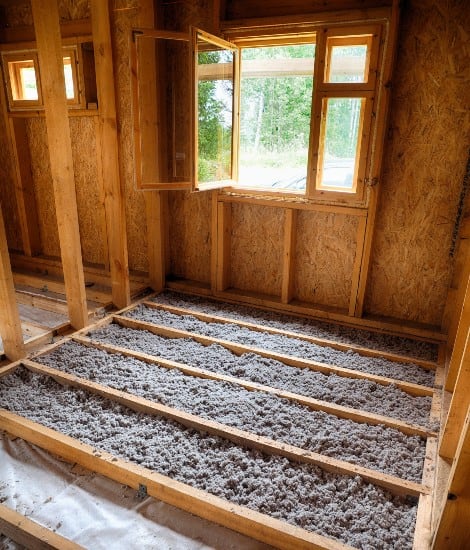
Cellulose insulation is made from recycled paper and is insect and rodent-resistant and contains a fire-retardant. It forms an effective barrier against heat transfer and has an R-value of 3.2 to 3.8 for every inch of thickness. It can be used for walls and ceilings of wooden sheds and used to fill hollow cores of double-walled plastic sheds too.
The insulation can be mixed with an adhesive and sprayed onto ceilings and walls between rafters and studs. Loose cellulose insulation can also be pumped between existing interior and exterior wall surfaces through two-inch holes at the top of the wall cavities. The holes are then plugged, patched, and can be painted so they disappear. It can also be pumped onto existing ceilings between ceiling joists too.
Cost: Depending on type and equipment rentals, between $0.50 and $3.25 a square foot.
4. Rigid Foam Board

Rigid foam board is typically pink or blue but can also be white or covered with foil on one or both sides. It is moisture-resistant and is made of expanded or extruded polystyrene. It works well as a thermal barrier for metal and wood sheds and has an R-value ranging from 3.85 to 5.2 per inch depending on the density of the material.
The foam boards can be cut with a utility knife to compression fit between studs, joists, and rafters. Alternatively, use it to cover the shed’s exterior and either nail it in place or use a recommended construction adhesive. The insulation should be covered with an interior or exterior grade wall covering depending on location to improve the fire rating and protect the insulation.
Cost: The average cost per square foot of rigid foam board is between $1.75 and $3.25.
5. Radiant Barrier
 A radiant barrier blocks radiant heat from the sun from entering and heating up the interior spaces of a structure. It commonly is a highly reflective surface and may be a plastic-like sheet wrap or an insulative material with a reflective surface. It blocks or reflects heat, where most insulations absorb it. A radiant barrier doesn’t have an R-value per se unless attached to an insulating material, however, it can cut 10% off air conditioning costs.
A radiant barrier can be stretched across the studs and rafters and fastened with staples, or it can wrap the exterior of the shed. A single layer is as effective as multiple layers, so only use one layer. It can be permeable or non-breathable, but non-breathable should be used on the surface nearest the living space. It can also double as a vapor barrier.
Cost: The cost per square foot ranges from $0.12 to $0.20 depending on the quantity purchased.
6. Spray Foam
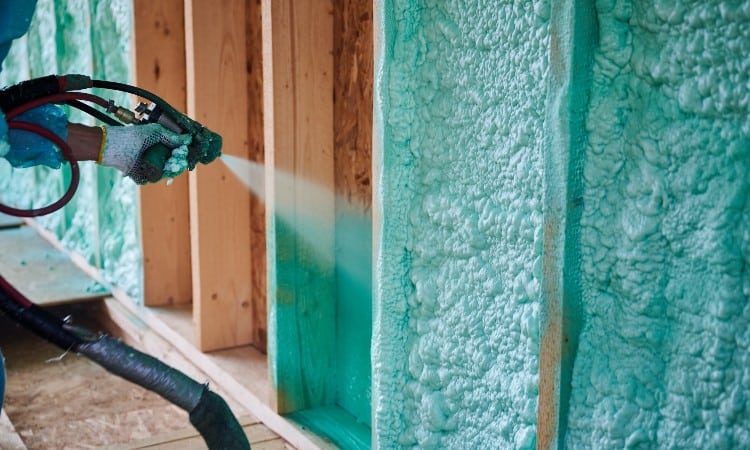
Spray foam is an open or closed-cell polyurethane spray-on foam that adheres on contact and then expands to fill the cavities between studs or rafters. Foam insulation fills all gaps and voids to provide a good thermal and vapor barrier. The foam has an R-value of 3.5 to 7 for each inch of thickness, with closed-cell being on the higher end. It is ideal for wood or metal sheds but is an expensive option.
The foam can be directly sprayed between studs, joists, and rafters to fill and seal the voids. Although more costly, it can also be used to seal the underside of the floor between joists to improve the thermal and moisture barrier. Due to off-gassing, it is recommended that spray foam be covered with wallboard or panels.
Cost: Depending on the type of spray foam, thickness, and DIY or professional, the price ranges from $1.50 to $8.25 a square foot.
How to Insulate a Shed for Free
There are different materials that offer insulating properties that can be had for free. Hay or straw, cardboard, rugs, thatching, and clay are just some that come to mind. The materials can be sourced for free from yard sales, Craigs List, neighbors, large box stores, or other people or places. Some materials may need to be stored until there’s enough, or added to walls, ceilings, roofs, or floors as acquired.
Straw And Hay
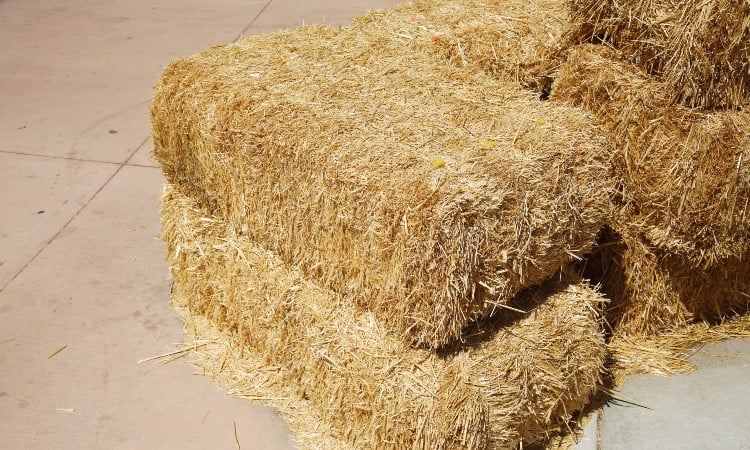
Straw and hay can be sourced from local farmers for free or with a little sweat equity. It’s a natural and sustainable material with good thermal properties, plus it has been used to insulate homes and buildings for millennia.
Straw has an R-value of 0.94 to 2.38 per inch depending on how tightly packed it is, while bales can provide values up to R-35 or more depending on their thickness.
Hay or straw can be packed between studs and rafters and covered, or full bails can be stacked around the exterior of the shed to create a thermal barrier. The straw and hay should be well-packed and kept dry to prevent mold and mildew caused by moisture. Unfortunately, hay and straw can attract insects and rodents and is also a fire hazard.
Cardboards
Cardboard boxes can be collapsed and used to insulate between studs and rafters. The corrugated nature of the cardboard helps to trap air and slow heat transfer. Layering the cardboard makes it thicker and improves its insulation value. Corrugated cardboard has an R-value of 3 to 4 for every inch of thickness.
The cardboard should be compression fitted between the framing members and either glued, stapled, or tacked into place. It should be tightly packed with layers overlapping and covering seams in previous layers. To prevent moisture damage, seal the open edges of the cardboard with impermeable tape. Unsealed edges will absorb moisture and become damp, which can lead to mold, mildew, and rot.
Fabric Rugs
Carpet is commonly used on floors to lessen direct contact with a cold surface. Since heat rises, there is minimal heat loss through the floor. However, standing on a cold floor can transmit that cold quickly to anyone in contact with it.
The thicker the attached under padding and carpet, the greater the insulation barrier. The R-value ranges from 0.7 to 2.1 depending on the thickness of the underpad and carpet, and on the type of materials they are made from.
Wall-to-wall carpeting in the shed isn’t necessary unless the whole floor is accessible. Carpeting the areas where people stand is a more common practice. Old rugs, rag rugs, or blanket rugs all provide a thermal barrier to cold transfer. Put down a waterproof membrane between the shed floor and carpet to prevent dampness, mildew, and rot from moisture transfer.
Thatching
Thatching has been used for millennia in many countries. The First Nations used a form of thatching on their shelters, and the first European settlers brought their version with them too. Although not common today in North America, it is an inexpensive or free roofing material. The thicker the thatching, the better the thermal resistance, with 10” of thatch having an R-value between 26 and 27.
A thatched roof is made up of straw or reeds bound into bundles or sheaves. The bundles are laid side-by-side and tied into place beginning at the eaves. The next row overlaps the first, and the process continues upwards to the ridge. Thatching can last 30 to 50 years, so it is better than many manufactured options, plus it insulates the shed from the outside.
Clay
Clay can be used in several formats to insulate a shed or building, and has been used for millennia. It can also last for centuries too! The ancients mixed straw with clay until it was well coated, and then formed it into walls. The clay acts as a binding agent as it dries, and the hollow straw traps air. The dried mixture has an R-value between 3 and 4 per inch and can be given a thin coat of clay or plaster and painted.
To insulate a shed, mix the clay with water to form a thick slurry, and then add dry straw, hemp, rice hulls, or similar dry vegetation. Balls of paper, vermiculite, or other similar materials can be used too. Mixing in some diluted boric acid into the slurry will help deter insects and prevent deterioration.
The clay mixture can be applied between the studs, but it is easier to tack a 12” wide strip of plywood across the stud faces and pack the mixture into the stud cavities. Once the mixture dries, move the plywood form up 10” and fill the cores. Repeat until the wall cavities are filled. The mixture will keep the shed warm in the winter and cool in the summer.
Additional Insulation Techniques
Once the walls, roof, and floor are insulated, it is important to look for other areas where hot or cold air or moisture can seep into the shed and seal them too. Even a small gap can ruin the whole effort.
Check where walls meet each other and also the roof, use an expanding foam sealer or caulking where necessary. Below, are some other ways to improve the thermal environment in your shed, and also decrease dampness.
Install Vapor Barrier

A vapor barrier helps prevent dampness from penetrating into the shed and collecting in some types of insulation. It is typically installed on the warm side of the studs and ceiling joists or rafters and protected by the interior or exterior finish, depending on climate conditions.
Foil-backed insulation or bubble wrap doesn’t require a vapor barrier as the foil does that job. However, use aluminum tape to seal all gaps, edges, and seams. Spray foam and rigid foam insulation also don’t require a vapor barrier provided there aren’t any gaps in the thermal barrier.
Seal Gaps and Windows
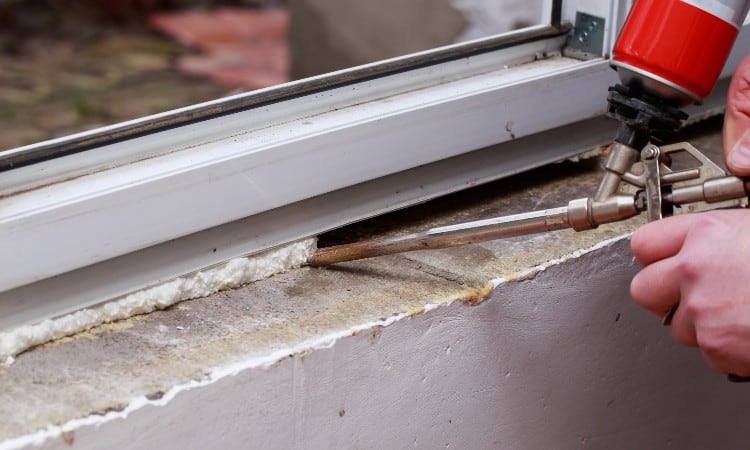
Check around any windows for gaps in framing or where the moving panes form seals. Caulk or spray foam to seal anywhere that air or moisture can penetrate, or replace old seals. This will help prevent drafts and make it easier to maintain a comfortable inside temperature. Older or single-pane windows aren’t as effective as modern double-pane windows, so you may want to consider replacing them.
Insulate and Seal Door
The door can create a large hole in the thermal barrier of a shed, especially if it is a double-wide, roll-up, overhead, or barn-style door. Most man-doors are hollow or solid core, with solid or insulated exterior doors being more effective at blocking thermal movement.
Check the draft seals and door sweep, and replace them if necessary. Spray foam or caulk any gaps around the door and shed framing. Also, consider gluing 1-1/2” to 2” rigid foam insulation using an appropriate adhesive to the inside of whatever style of door the shed has.
What is the Cheapest Way to Insulate a Shed?
Insulating the walls and ceiling or rafters and putting down a carpet with a thick underpad will make a shed cooler in the summer and warmer in the winter. The use of a vapor barrier or impermeable reflective membrane will also decrease heat transfer and moisture damage. However, the shed will still have an internal temperature affected by external climate extremes unless there is a heating or cooling source for the shed.
There are many ways and materials that can be used to insulate a shed. The cheapest way is to use free materials. However, you may need to stockpile the free material until there is enough to insulate a shed.
An 8’x12’ shed has a wall and ceiling surface area of 416 sqft. So, saving enough bubble wrap to provide an inch (about 4 layers for an inch of thickness) of free coverage for somewhere between R-1 and R2 for that surface area, could take a long time.
The cheapest and most reasonable choice for insulating a 2×4 framed shed is fiberglass insulation. Six bundles of kraft-faced R-15 will cover the walls and ceiling for about $355. It can be completed by most DIYers on a weekend, and while not free, it gives an equivalent R-value to 10” to 15” of bubble wrap.
Other free choices have potential, but there are also issues to be considered. Hopefully, you have enough information to make the best insulation choice for your shed and budget.

Eugene has been a DIY enthusiast for most of his life and loves being creative while inspiring creativity in others. He is passionately interested in home improvement, renovation and woodworking.